Git服务器搭建与客户端简单操作

服务器端准备工作:

1. 安装git

1
apt-get install git

2. 为了安全,新建一个专门用于代码部署的无特权用户

1
2
3
useradd -m git
#设置该用户的密码
passwd git

3. 新建一个目录作为要部署代码的根目录,如:

1
mkdir /var/www/git/item.git

4. 将这个目录的属主和属组都改为上面新建的用户git

1
2
cd /var/www/git
chown git:git item.git

5. 切换到部署代码的专用用户

1
su git

6. 进入项目根目录,初始化为git仓库

1
2
cd item.git
git init Initialized empty Git repository in /var/www/git/item.git/.git/

7. 必要的配置

1
2
3
4
5
6
7
8
#让仓库接受代码提交
git config receive.denyCurrentBranch ignore

#可选
git config core.worktree ~/www

#可选,禁止强制推送
git config --bool receive.denyNonFastForwards false

注意!

我们可以在自己的服务器上创建git仓库,有两种方式:

git –bare init (裸仓库)

git init

两者区别:

1,普通git仓库的目录结构就和你的代码目录结构一致,只多了.git目录,.git目录中包含了git的一些配置等数据

2,裸仓库只保存了一些配置信息等,肉眼是找不到我们所上传的代码的

额外说明:用”git init”初始化的版本库用户也可以在该目录下执行所有git方面的操作。但别的用户在将更新push上来的时候容易出现冲突。比如有用户在该目录(就称为远端仓库)下执行git操作,且有两个分支(master 和 b1),当前在master分支下。另一个用户想把自己在本地仓库(就称为本地仓库)的master分支的更新提交到远端仓库的master分支,他就想当然的敲了git push origin master:master于是乎出现错误 ,因为远端仓库的用户正在master的分支上操作,而你又要把更新提交到这个master分支上,当然就出错了。

确定一个repository是否为bare库的关键在于core.bare属性(boolean型属性)。core.bare属性可以有git config命令设置,也可以通过修改config文件的方式设置,conf文件指的就是当前库下面的conf配置文件,如果这里 bare = true 那么即使有.git文件夹也还是不能进行相关操作。 如果使用了git init初始化,则远程仓库的目录下,也包含work tree,当本地仓库向远程仓库push时, 如果远程仓库正在push的分支上(如果当时不在push的分支,就没有问题), 那么push后的结果不会反应在work tree上, 也即在远程仓库的目录下对应的文件还是之前的内容,必须得使用git reset –hard才能看到push后的内容.

本地仓库准备工作:

1. 通过 git clone 或 git pull 从仓库上将代码获取到本地

1
2
3
4
Administrator@PC-20170526BRPS MINGW32 /d/www/gitgit clone git@t.024ea.com:/var/www/git/item.git

Cloning into 'item'...
git@t.024ea.com's password: warning: You appear to have cloned an empty repository.

接下来接个phpstrom编辑更改代码提交,就简单了。

git利用post-receive自动化部署:

1. 更新服务端 git 仓库状态并检出文件

1
2
3
4
5
6
7
8
9
10
11
12
13
14
cd /var/www/git/item.git
git update-server-info
git checkout -f

# OR:

# 如果push的不是master分支
# git checkout branch_name

ls
new.html
cat new.html
#已经能看到提交文件
hello new git!

2.设置服务器钩子

1
2
3
4
5
6
#仓库配置文件
cd /var/www/git/item.git/.git/hooks

#默认没有这文件,新建了一个
touch post_receive
vim post_receive

shell脚本

1
2
3
4
5
6
7
8
9
10
#!/bin/sh
chown www-data /var/www/git/item.git -R
DEPLOY_PATH=/var/www/git/item.git

unset  GIT_DIR #这条命令很重要
cd $DEPLOY_PATH
git reset --hard
git pull
chown www-data -R $DEPLOY_PATH
chgrp www-data -R $DEPLOY_PATH

关于unset GIT_DIR的说明:

经过查找资料,如过没有unset命令,在文件中添加 git pull 时会报错,提示:”fatal: Not a git repository: ‘.'”。hook脚本执行了cd之后,继续执行git语句拉取的时候还是在hooks文件夹下,而不是cd的文件路径。git的hooks里面默认有一些环境变量,会导致无论在哪个语句之后执行git命令都会有一个默认的环境路径,既然这样unset 掉默认的GIT环境变量就可以了。

参考:http://alfred-long.iteye.com/blog/1836347

补充

关于本地第一次使用clone命令无法使用git用户登陆,需要先使用命令ssh-keygen,参考:

1
2
3
4
5
6
7
8
9
10
11
12
13
14
15
16
17
18
19
20
21
root@office-host-ubuntu:/var/www/git# ssh-keygen
Generating public/private rsa key pair.
Enter file in which to save the key (/root/.ssh/id_rsa)/home/git/.ssh/id_rsa
Enter passphrase (empty for no passphrase):
Enter same passphrase again:
Your identification has been saved in /home/git/.ssh/id_rsa.
Your public key has been saved in /home/git/.ssh/id_rsa.pub.
The key fingerprint is:
SHA256:eXBtsym+2BZfcbWIk3E7Xh6doWn7q1lzMotX1zXxsbY
root@office-host-ubuntu The key's randomart image is:
+---[RSA 2048]----+
|                 |
|           o . +.|
|        . . O = @|
|         + = @.O=|
|        S o * *o*|
|         o.. o.E+|
|          .o .++o|
|         o....+=o|
|        ..o .+o..|
+----[SHA256]-----+

ubuntu + phpStorm + Xdebug安装及调试设置

1、下载Xdebug

点击下载

2、安装

1、接下源码
1
tar zxvf xdebug.tar.gz
2、编译源码
1
2
3
4
5
cd xdebug
/usr/local/php/bin/phpize
./configure --enable-xdebug --with-php-config=/usr/local/php/bin/php-config
make
make install

安装完成后会出现:

1
2
3
4
5
6
7
8
9
10
11
12
13
14
15
16
17
18
19
20
21
22
Installing shared extensions:     /usr/local/php/lib/php/extensions/no-debug-non-zts-20160303/
+----------------------------------------------------------------------------------------------------+
|
| INSTALLATION INSTRUCTIONS
| =========================
|
| See http://xdebug.org/install.php#configure-php for instructions
| on how to enable Xdebug for PHP.
|
| Documentation is available online as well:
| - A list of all settings: http://xdebug.org/docs-settings.php
| - A list of all functions: http://xdebug.org/docs-functions.php
| - Profiling instructions: http://xdebug.org/docs-profiling2.php
| - Remote debugging: http://xdebug.org/docs-debugger.php
|
|
| NOTE: Please disregard the message
| You should add "extension=xdebug.so" to php.ini
| that is emitted by the PECL installer. This does not work for
| Xdebug.
|
+----------------------------------------------------------------------------------------------------+
3、修改配置文件
1
2
3
4
5
6
7
8
9
10
11
12
13
14
15
16
17
18
sudo vim php.ini
#加一下内容
[Xdebug]
zend_extension=/usr/local/php5.6/lib/php/extensions/no-debug-non-zts-20131226/xdebug.so
xdebug.idekey = PHPSTORM
xdebug.auto_trace = on
xdebug.default_enable = on
xdebug.auto_profile = on
xdebug.collect_params = on
xdebug.collect_return = on
xdebug.profiler_enable = on
xdebug.remote_enable = 1
xdebug.remote_host = 192.168.1.225
xdebug.remote_port = 9059
xdebug.remote_handler = dbgp
xdebug.remote_connect_back = 1
xdebug.trace_output_dir = "/usr/local/php/xdebug/"
xdebug.profiler_output_dir = "/usr/local/php/xdebug/"

重启lnmp后通过php -v应该可以看到

1
2
3
4
5
PHP 5.4.45 (cli) (built: Jan 19 2018 10:30:47)
Copyright (c) 1997-2014 The PHP Group
Zend Engine v2.4.0, Copyright (c) 1998-2014 Zend Technologies
with Xdebug v2.4.1, Copyright (c) 2002-2016, by Derick Rethans
with Zend Guard Loader v3.3, Copyright (c) 1998-2013, by Zend Technologies

4、安装火狐xdebug插件

下载插件地址

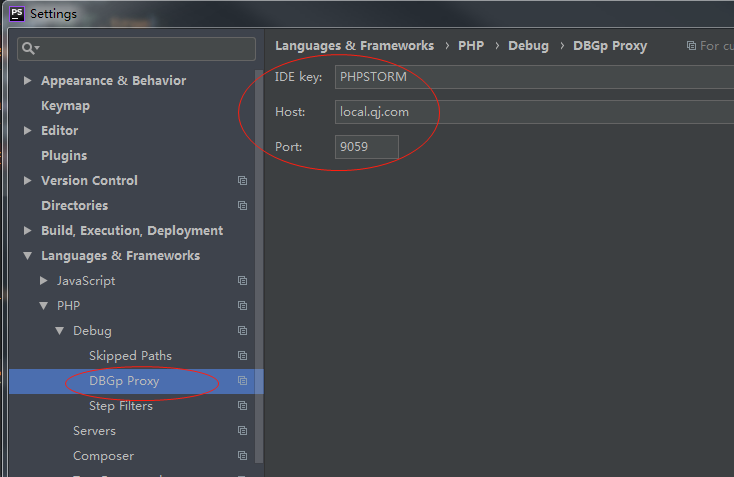
安装完毕之后, 打开该插件的options, 设置IDEKey为PhpStorm.

需要和phpstorm中设置的ide key 保持一致

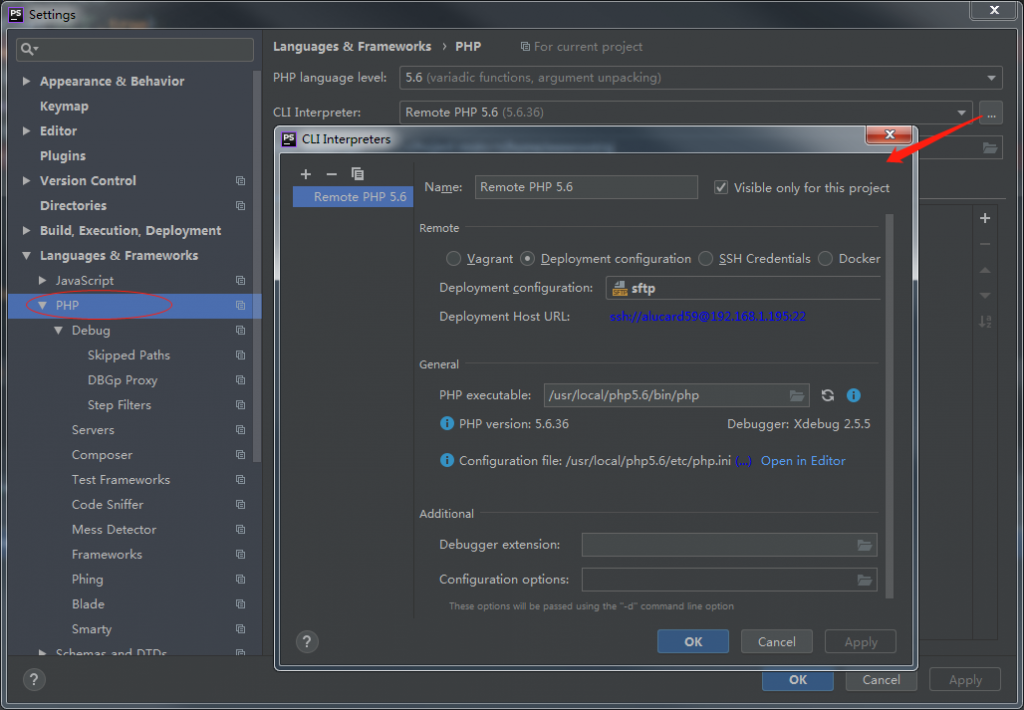
5、phpstorm的设置

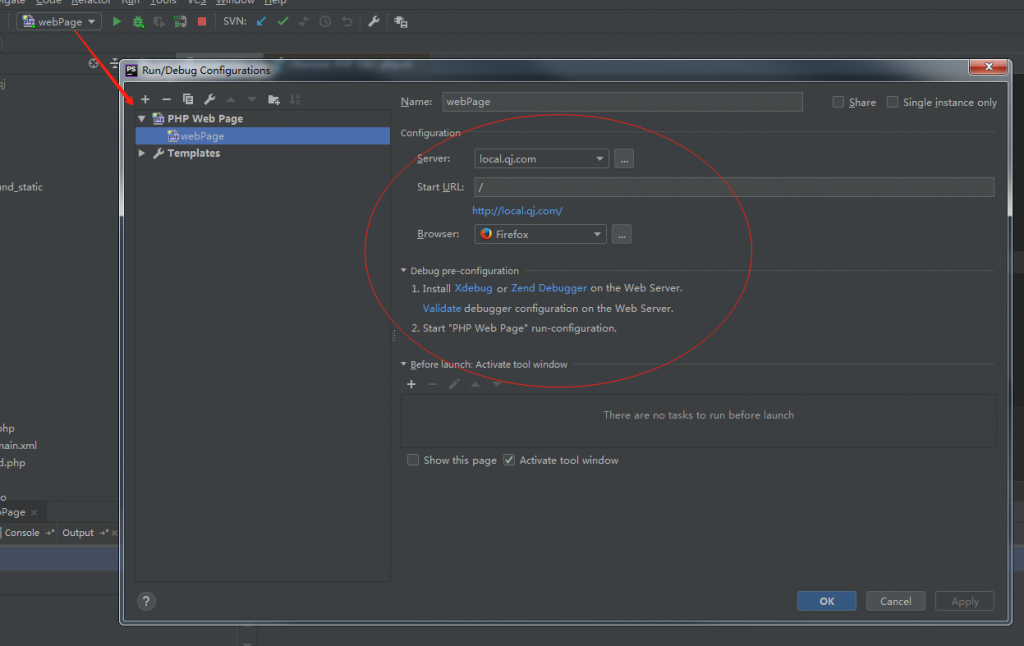
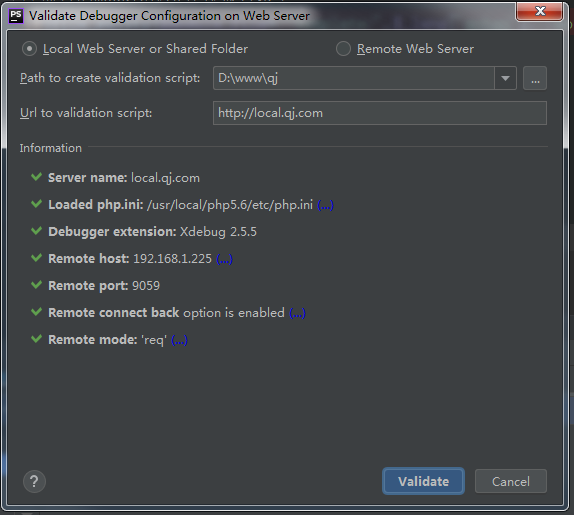
6、开始进行断点测试,断点测试前,可以进行xdebug的验证是否配置成功

第一个地址栏填写你的项目的地址

第二个地址栏填写你访问的地址

点击validate开始验证,若有错误,根据提示修改配置。

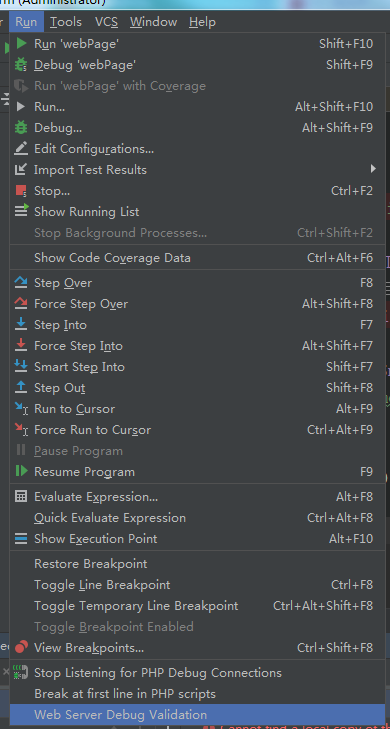
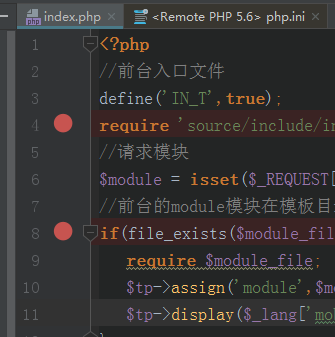
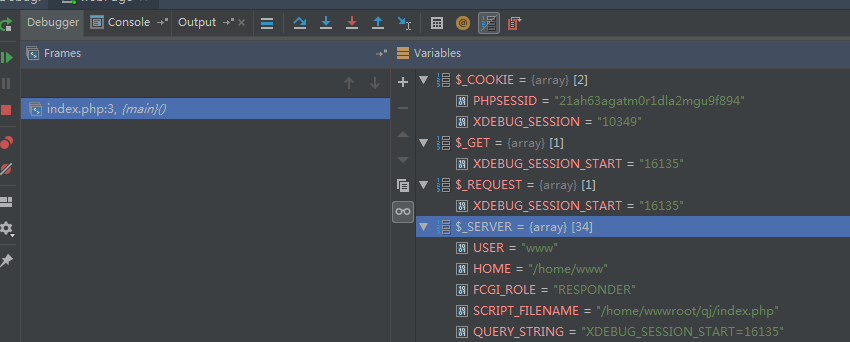
7、点击phpstorm小电话图标,开始监听,设置断点并并调试。

原理示意图(从xdebug的官网上引用的)

微信小程序TGIT检出远程master到本地master

先配置小程序开发工具中的版本控制
设置中用户信息填写由小程序后台TGIT添加的用户,需要填写全名,在小程序后台TGIT项目控制的链接进入腾讯云DEV,点击项目进入工蜂,查看全名通常比较长最后一个下划线后接的是后台输入的用户名。
邮箱是腾讯云分配的,通常是你的很长的用户名@git.cloud.tencent.com。
网络认证,认证方式选择最后一项填入用户名密码,即小程序后台新建用户的时候填入的账号密码,账号就是工蜂用户名,很长的那个。
远程,点添加将工蜂中的项目地址填入,名称跟工蜂中的名称一致即可。
配置正确之后,点击抓取,抓取项目,能看见项目中分支信息出现在左侧远程下面,然后拉取可以拉取源代码。
注意,第一拉取时,比如远程git项目为Estate/master分支。
从Tgit终端控制台中输入

1
git checkout -b master Estate/master

注意如果Tgit上有代码则需要将本地所有文件先删除,留空项目目录。如果没有应该首先提交本地代码,再推送,产生新git分支

使用PPA源安装支持HTTP2的apache2和php

1
2
3
4
5
6
7
8
LC_ALL=C.UTF-8 sudo add-apt-repository -y ppa:ondrej/apache2 &&
sudo apt-key update &&
sudo apt-get update &&
sudo apt-get upgrade -y &&
sudo apt-get install apache2 -y &&
sudo a2enmod rewrite mime include headers filter expires deflate autoindex setenvif ssl http2 &&
sudo apt-get install php5.6 -y &&
sudo apt-get install libapache2-mod-wsgi-py3 -y